How to photograph and process the Milky Way
- July,24, 2020
Photographing the Milky Way has long been on my photography bucket list and recently I managed to capture it for the very first time. I explain how I set up the camera, take the shot and the steps I take to produce the final image when I'm out photographing the Milky Way.
Getting started
There are a number of factors that will help you when photographing the Milky Way.
Location
You need to find a really dark place. The darker the better so ideally far from built up areas with streetlights. It is possible to capture the Milky Way from a garden in the middle of a city (I've done it myself) but darker is better. A darker sky will allow you to pick up more contrast and less noise. For this tutorial I went to Anglers Country Park, Wakefield. Anglers is classed as semi-rural so in theory you should be able to see the Milky Way with the naked eye (faintly) on a good night.
Finding the Milky Way
You need to know where to look for it in the sky. I use a free Star Tracker app for Android, which gives you an awesome 3d view of stars, constellations and of course the Milky Way. Just hold the phone up and point it to the sky.
Equipment
You need some basic equipment. You will need a camera that gives you manual control of shutter speed and aperture. You will also need a lens that can let in plenty of light (so ideally f/4 or faster). The Milky Way is big so the wider your lens can go the better. You will also need a steady tripod. Here is the equipment I used for this tutorial:
Nikon Z6
Nikon 24-70 f/2.8 S lens
Vanguard Alta Pro SHB 100 tripod
iOptron SkyTracker Pro
Note that a tracker is not essential. Trackers compensate for the rotation of the Earth, which causes stars to appear to move in the sky. When taking long or multiple exposures this will cause 'star-trailing' to occur in you photos. You can get good results from short, single exposures but the stacing multiple exposures allows you to capture more detail and reduce noise.
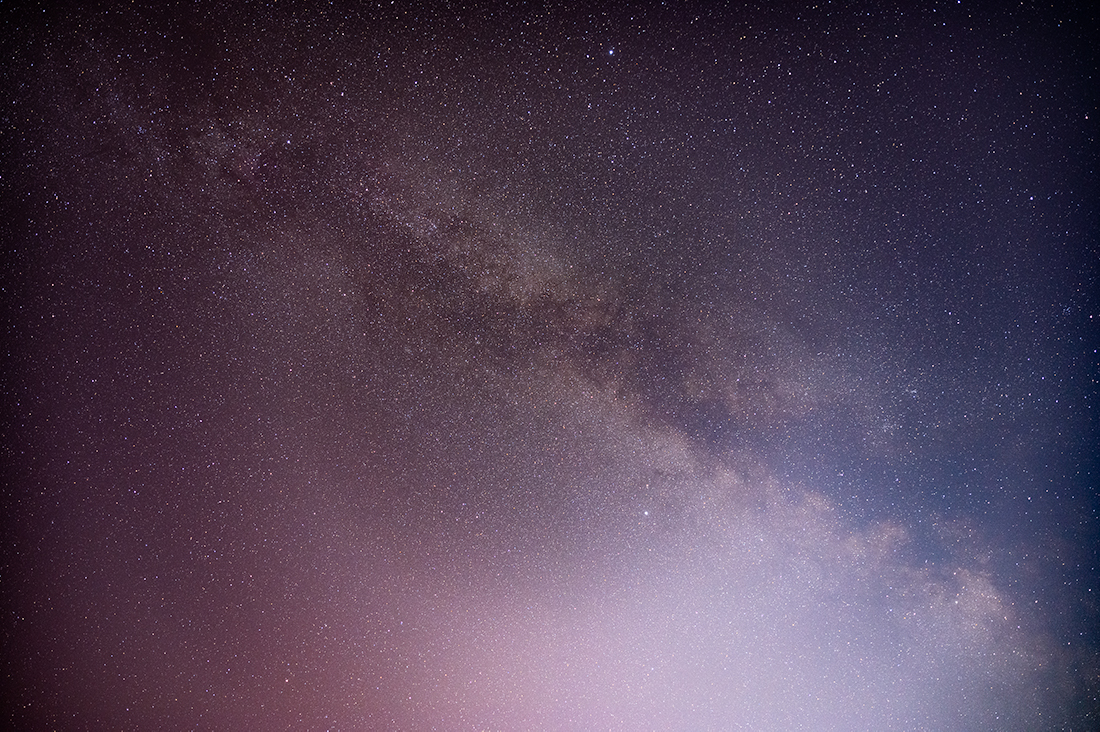
Before and after
So here is the shot that I got. On the left is an export of a single raw file with no adjustments made. This is exactly how it came out of the camera. On the right is the final image. Quite a difference! Move the slider to compare the two images.
Getting the shot
The night was extremely dark and the sky was clear. There was no moon and I was (reasonbly) far from artificial light. After being out in the dark for an hour or so my eyes started to adjust and very, very faintly I was able to make out the outline of the Milky Way directly overhead. The best shots of the Milky Way contain an interesting landscape or foreground element but for this shot I wanted to concentrate on the Milky Way. I mounted the camera on the star tracker, which was mounted on the tripod and pointed it directly up towards where I could make out the Milky Way outline.
I took a total of 20 exposures of 10 seconds each at ISO3200, 24mm and f/2.8, shooting in raw.
Processing the image
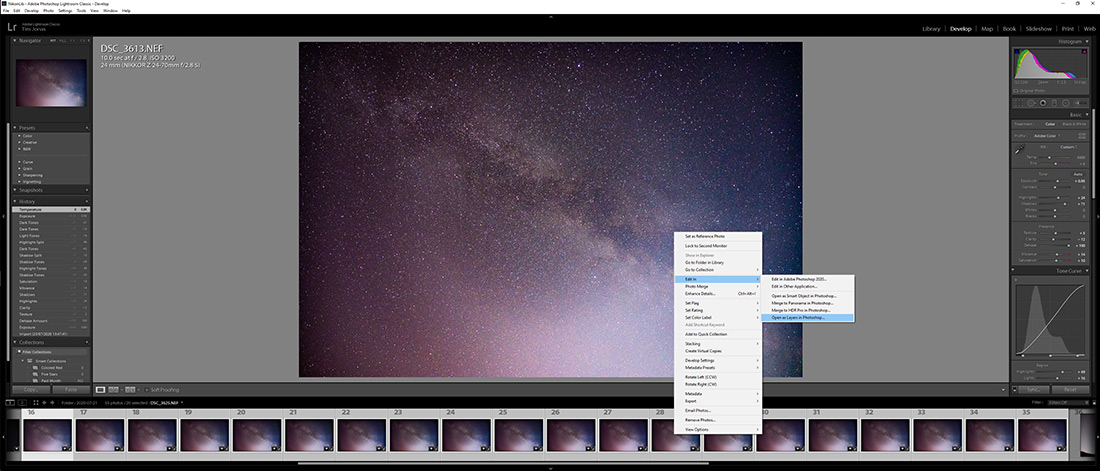
The first step is to load the files from the camera into Lightroom and go to 'Develop'. The image below shows the camera settings I used and I've highlighted the 20 photos that I'm going to use for this stack. The raw image from the first shot is displayed and already you can make out the Milky Way.
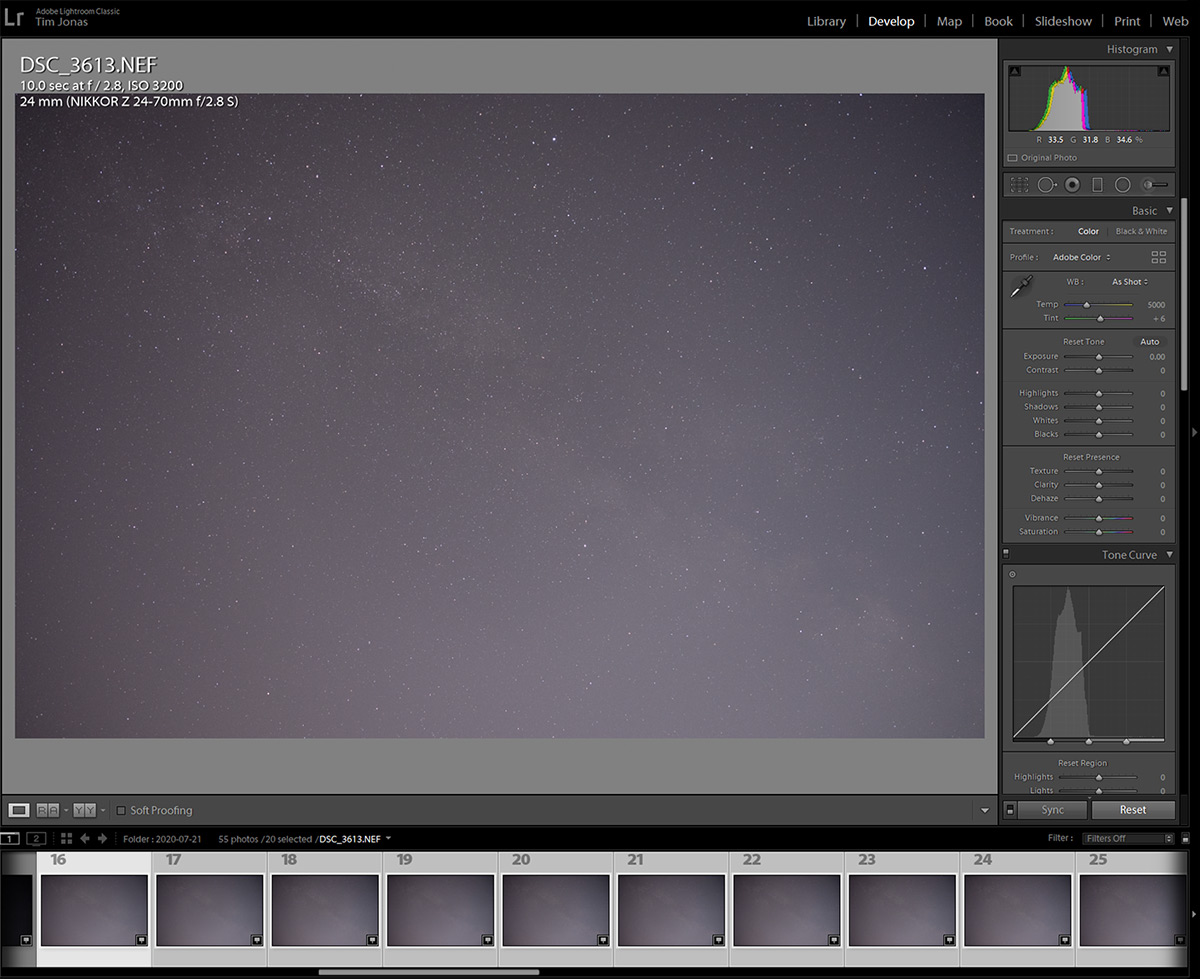
Lightroom
Next, select the first image only. I make the adjustments to a single image to begin with then apply to the rest later. The first adjustment I make is to slide the 'dehaze' slider all the way to the right as highlighted below. Already you can see this makes a huge difference, bringing out lots of extra detail.
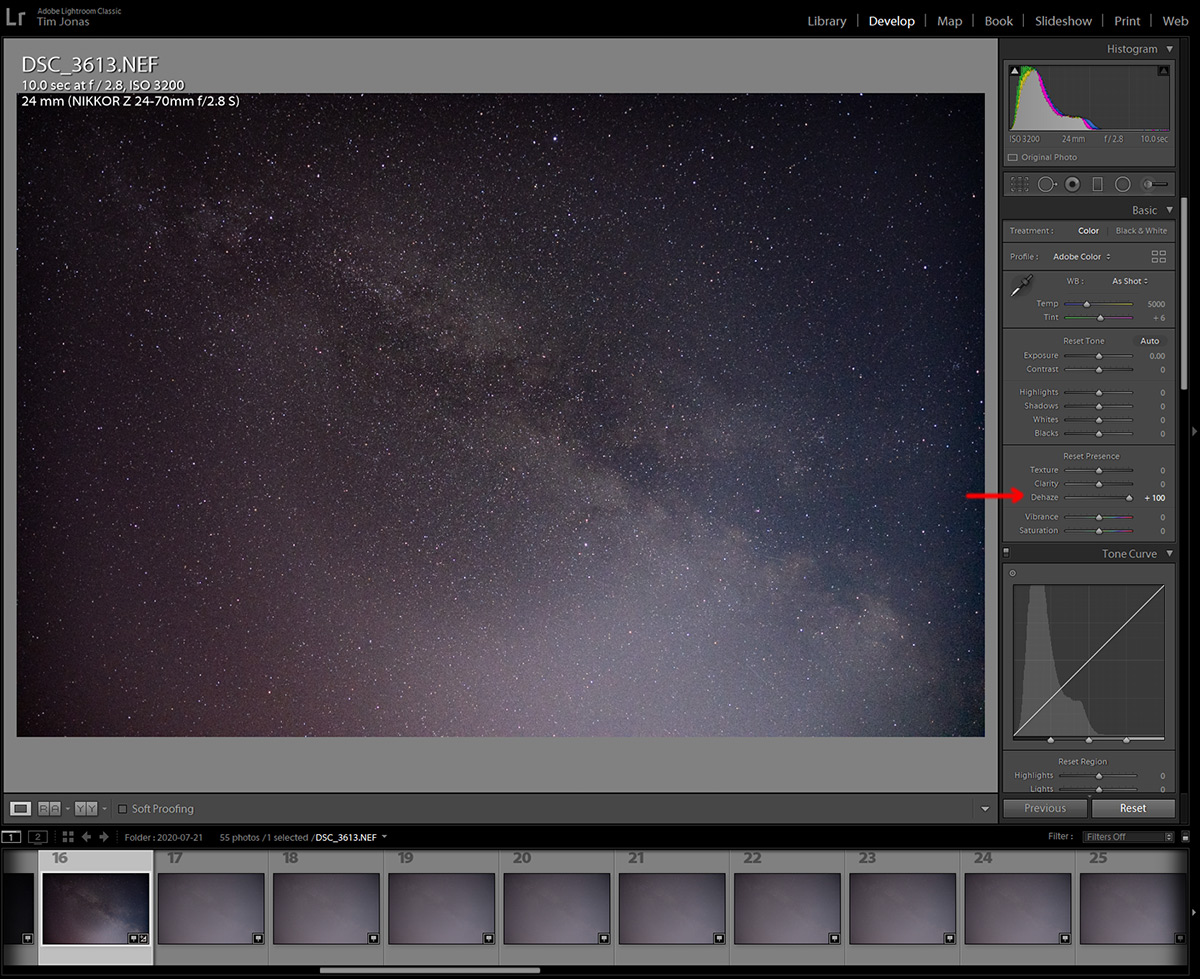
Lightroom
Using the other adjustments I play around until happy with the image. The idea is to bring out as much colour and detail as possible without introducing too much noise.
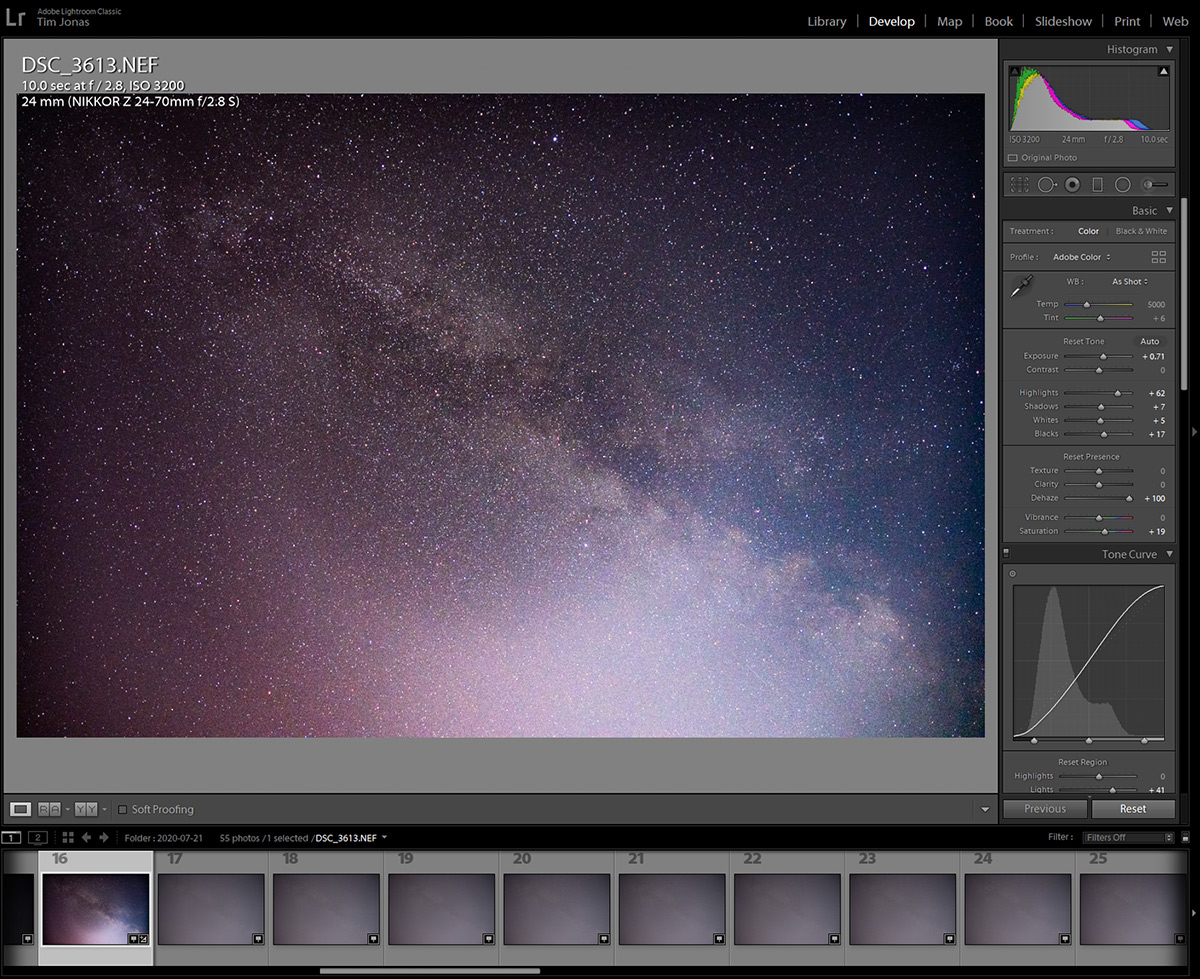
Lightroom
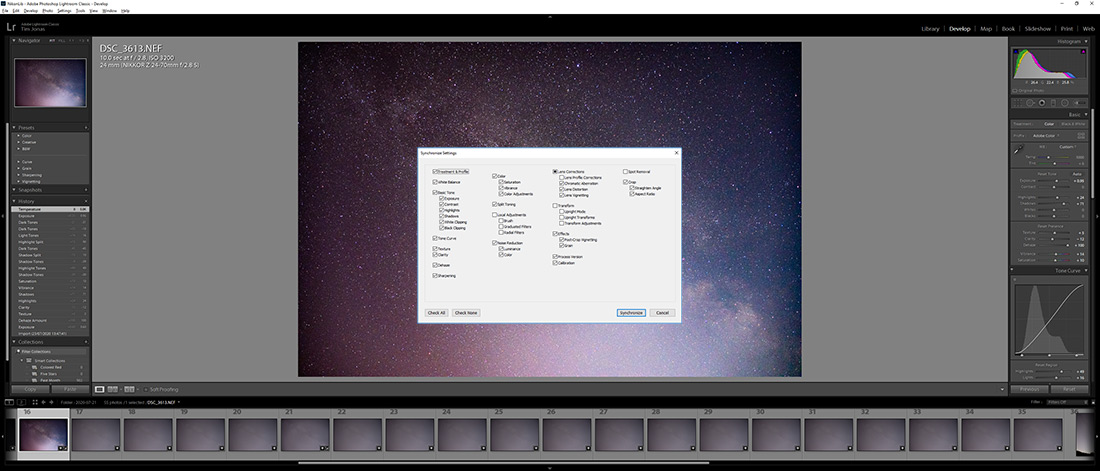
Once happy with the image apply the exact same settings to all of the other images in the stack.
Select all of the images, including the first image that has been edited and then 'Sync' the settings. Go to 'Settings' > 'Sync settings...', tick all of the settings you want to sync and then 'Synchronize'.
Lightroom
The next step is to combine all 20 of the images into a single stack and to do that we need to head over to Photoshop.
Select all 20 images, right click and then select 'Edit in' > 'Open as layers in Photoshop...'.
Lightroom
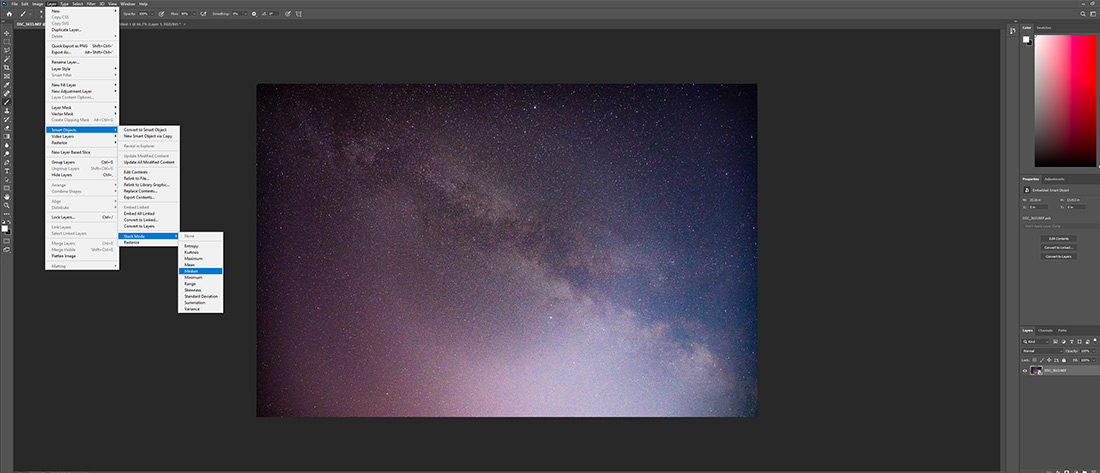
With Photoshop open you should now see all 20 images as seperate layers. I used the star tracker so I don't need to worry about aligning the layers but you may need to check that each layer is exactly aligned. Before we can create the stack we need to convert the layers to a smart object.
Select all 20 layers and select 'Layer' > 'Smart object' > 'Convert to smart object'.

Photoshop
And the final step is to select the stack mode. This uses the smart object to combine all 20 layers, looking at each individual pixel and displaying the average colour. When you photograph the sky some light is constant (the stars) but other light is picked up that is random (noise). By using the average from all 20 images you will be keeping more of the constant light and less of the noise.
Select 'Layer' > 'Smart object' > 'Stack mode' > 'Median'.
Photoshop
And that's it!
Milky way
You may want to apply some further adjustments to bring out even more contrast and colour. I really went to town on it and came up with this as my final image:
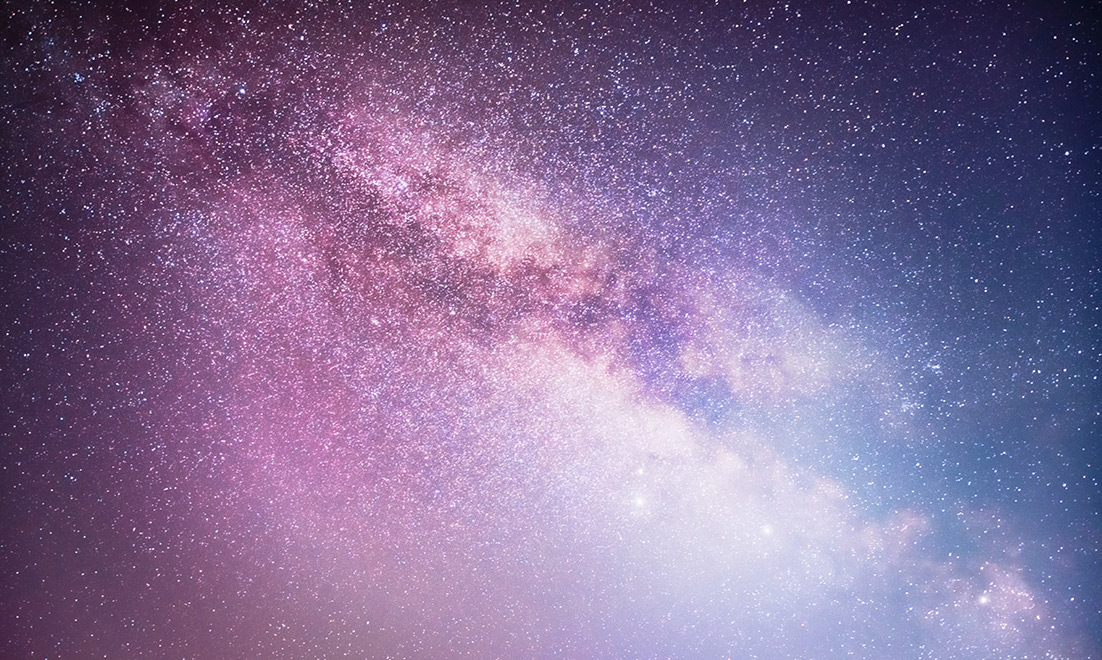
Milky way
I finally got to photograph the Milky way and I'm fairly happy with the results so far. Hopefully, this will be a useful guide for anyone hoping to get started. I'll continue to experiment and practice and refine my own technique. If you have any suggestions how I could do better then please let me know!
Read next
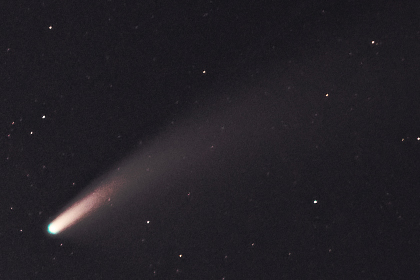
Comet C/2020 F3 (NEOWISE)
- by Tim Jonas
- July 22, 2020
- 0 Comments
Comet Neowise was discovered back in March and has been visible throughout July. After weeks of cloudy nights I finally got a chance to see it.
Comment
No comments
Leave a comment